Product Badges and Swatches
The Product Badges feature in the Renovate theme allows you to highlight key product details such as discounts, sale offers, and special labels. By visually emphasizing these elements, badges help attract customer attention, enhance product visibility, and encourage faster purchasing decisions.
How to Enable Badges
- From your Shopify admin, go to Online Store → Themes.
- Click Customize on the Renovate theme.
- In the Theme Editor, open Theme Settings (bottom-left corner).
- Select the Badges option.
- Checked the Show badges option.
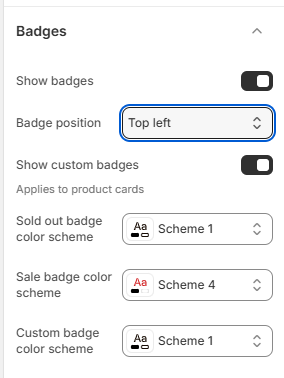
Configure Badges Settings
- Show Badges: Enable this option to display badges on product cards, highlighting important product statuses such as sale or sold out.
- Badge Position: Choose where badges appear on product images (e.g., Top Left, Top Right).
-
Show Custom Badges:
Enable this option to display custom badges on product cards for additional highlights or
labels.
Note: Applies to product cards. - Sold Out Badge Color Scheme: Select a color scheme (e.g., Scheme 1) for the Sold Out badge.
- Sale Badge Color Scheme: Choose a color scheme (e.g., Scheme 4) to style sale badges.
-
Custom Badge Color Scheme:
Define a color scheme (e.g., Scheme 1) for custom badges.
Note: This also affects the product count badge on collection pages.
Product Swatches
The Product Swatches feature in the Renovate theme transforms product options like colors into interactive visual swatches. Instead of relying on text-based selections, customers can easily view and choose options through intuitive, clickable samples. This enhances product presentation, improves user experience, and helps customers make faster and more confident purchasing decisions.
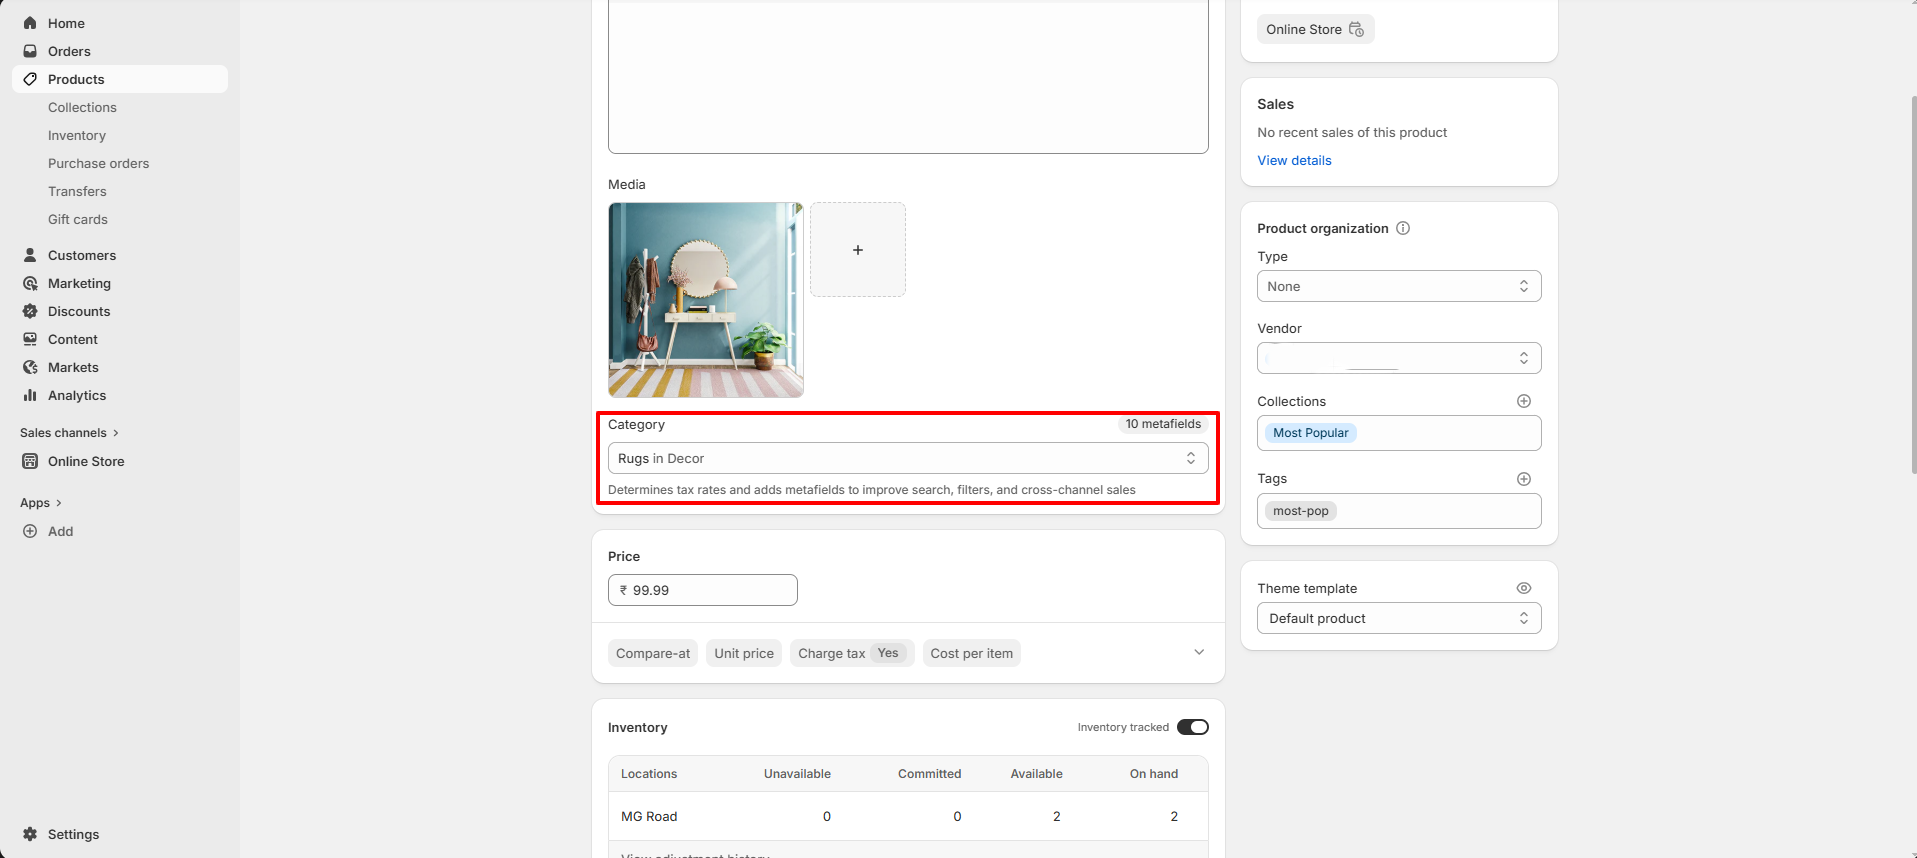
Step 1: Assign a Product Category
Shopify enables category metafields (e.g., Color, Size) only after a product has an assigned category.
- From your Shopify admin, go to Products.
- Click the product you want to edit.
- In the Category section, click Browse categories.
- Select a relevant category (e.g., Apparel & Accessories → Clothing → Shirts).
- Click Save.
Note: Only products with assigned categories can use category metafields.
Step 2: Configure the Color Metafield
Once a category is assigned, you can configure available values for the Color metafield.
- From your Shopify admin, go to Settings → Custom data → Categories.
- Click the category you previously assigned.
- Locate the Color metafield and click Manage entries.
- Add new color entries:
- Enter a color name (e.g., Red, Blue).
- Optionally upload a swatch image or enter a color hex (e.g., #FF0000).
- Click Save.
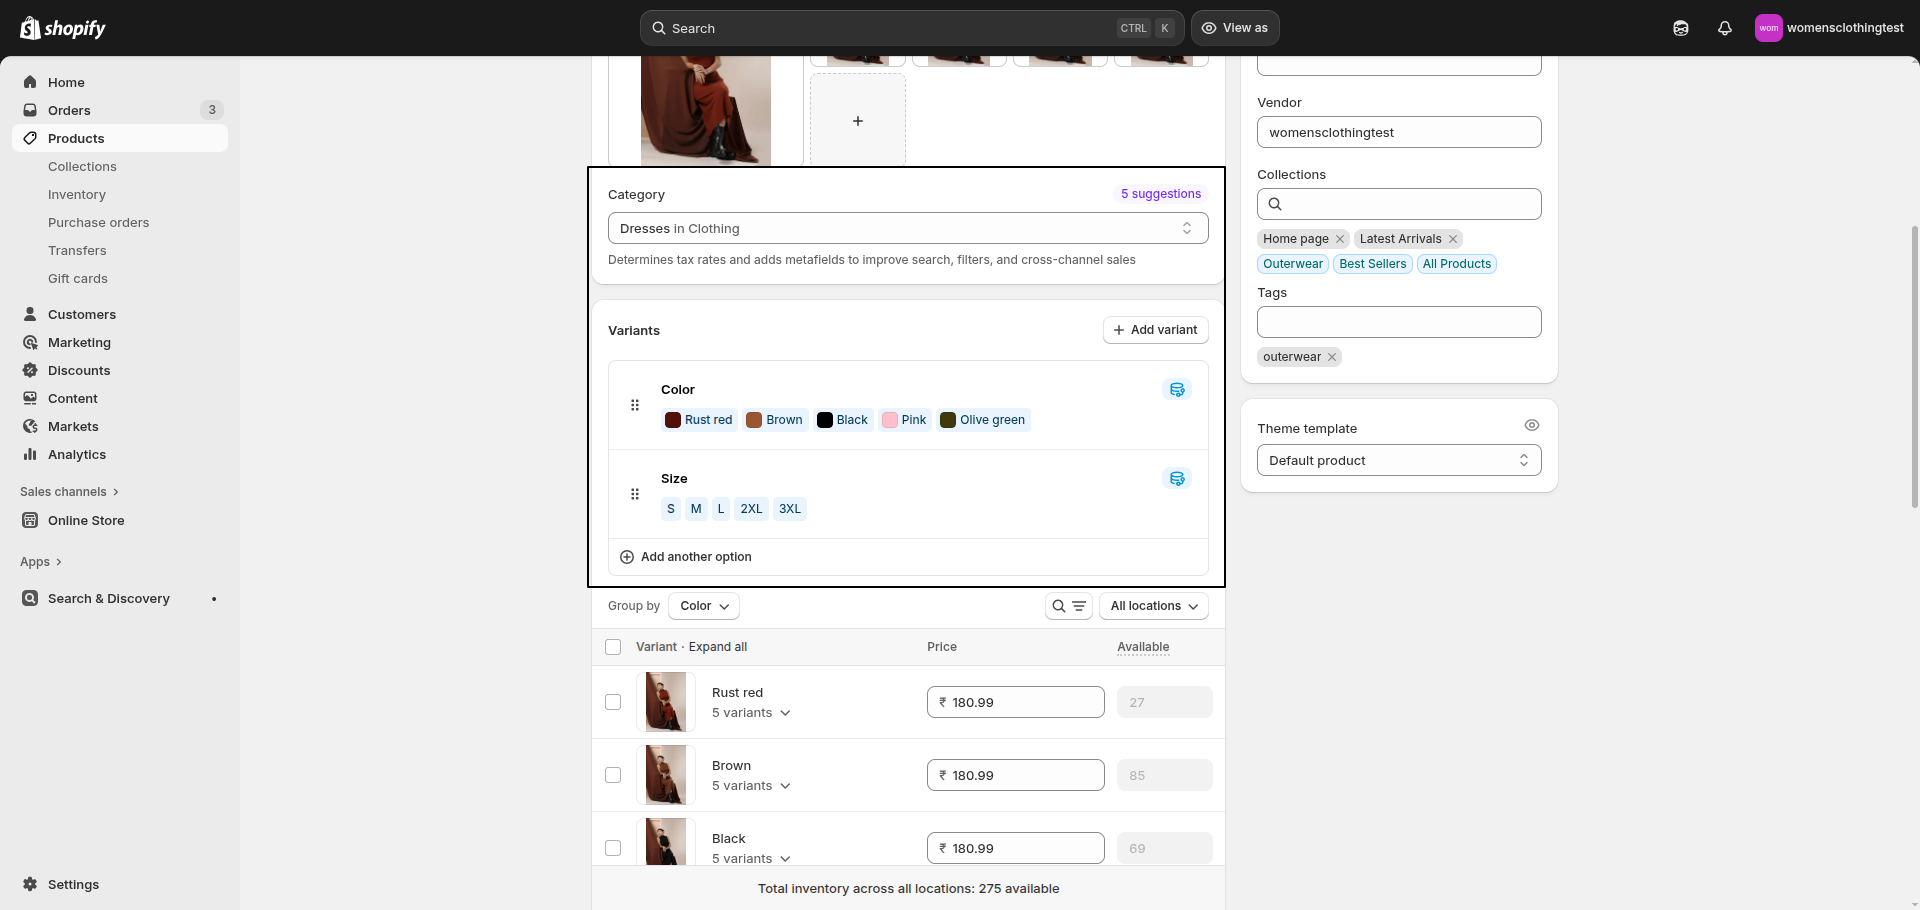
Step 3: Connect the Color Metafield to Variant Options
Link your product's Color option to the metafield you just configured.
- Open your product in the Products section.
- Under Variants, click Add options like size or color.
- In Option name, type Color.
- Click the dynamic source icon (🔗) next to it.
- Select the Color category metafield.
- Assign each variant the appropriate metafield entry (e.g., Red, Blue).
- Click Done and then Save the product.
Step 4: Set Up Swatch Shape
You can configure the global swatch shape for product swatches across your store.
- From your Shopify admin, go to Online Store → Themes.
- Click Customize on the Renovate theme.
- In the Theme Editor, navigate to Theme Settings → Color Swatches Selectors.
- Select your desired swatch shape from the available options:
- Circle: Circular swatch (default if none is selected).
- Square: Perfect square swatch.
- Pill : Rounded pill-shaped swatch.
- Default : Uses the theme's default swatch styling.
- Click Save to apply your changes.
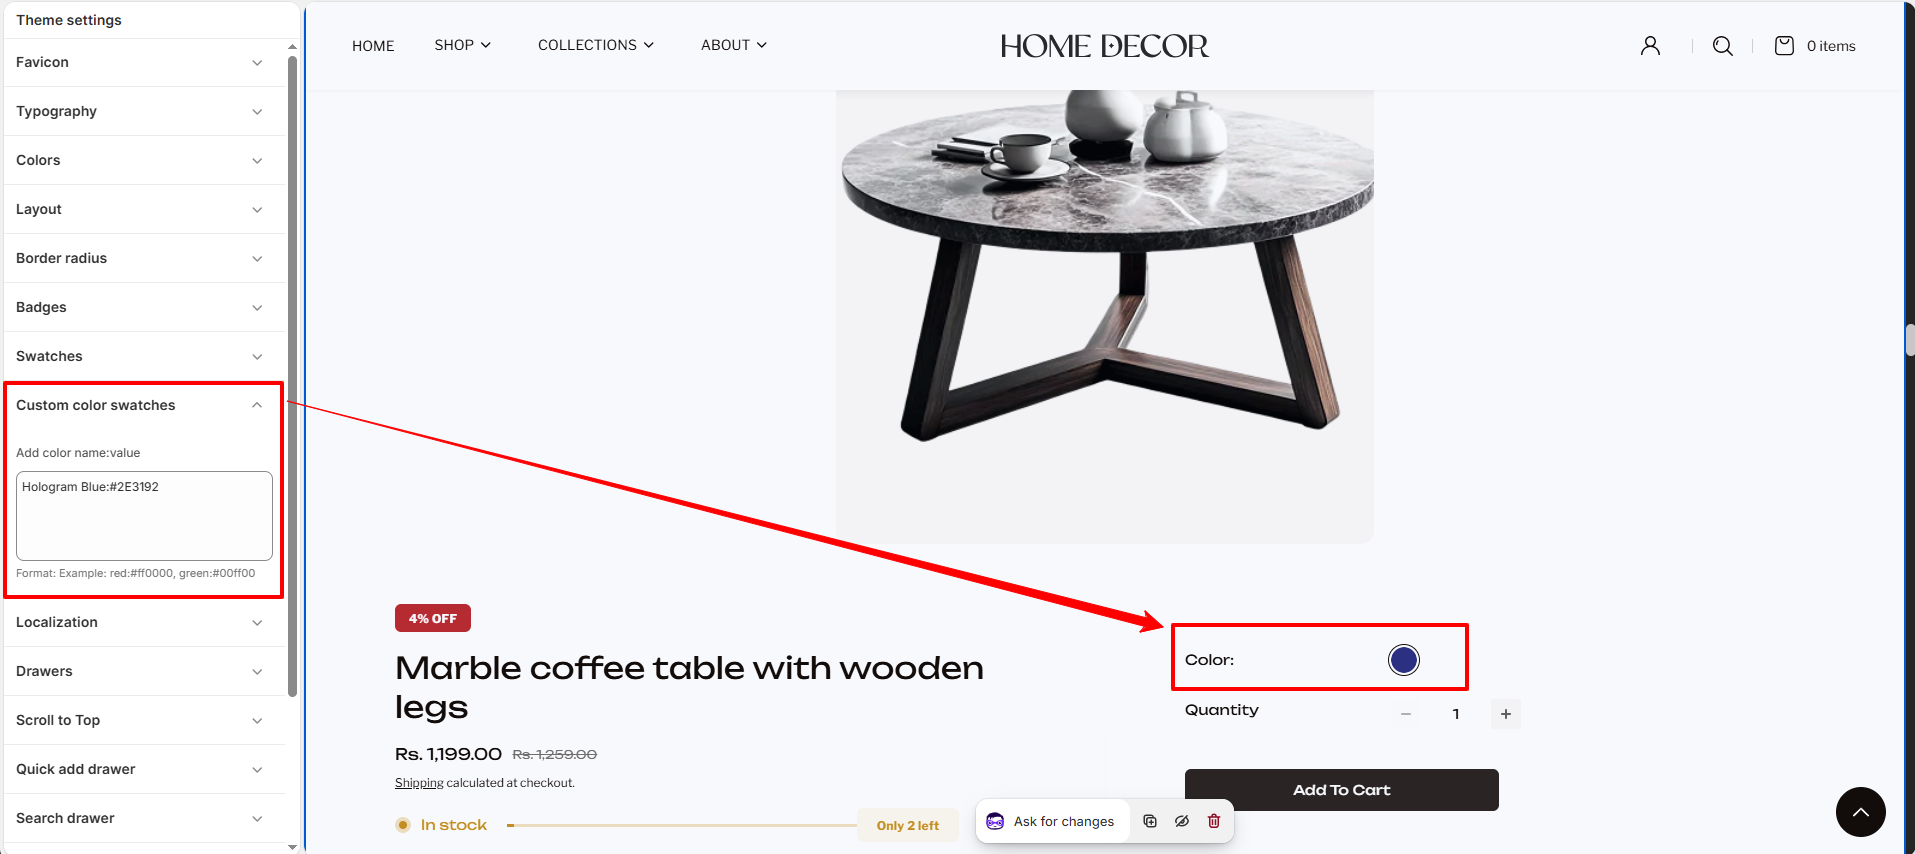
Custom color swatches
The Custom color swatches setting allows you to define specific colors for product variant options using custom names and hex values. This ensures that color swatches are displayed accurately across product pages and quick add sections.
Custom color values
This option lets you manually assign colors to variant names by entering color labels along with their corresponding hex codes. These custom values override default swatch detection and provide consistent color representation.
-
Custom color swatches – Enter color names and their hex values in the
format
colorname:#hexcode, separated by commas. Example:red:#ff0000, green:#008000. - Always follow the correct format when adding custom color swatches.
- Format: colorname:#hexcode, colorname:#hexcode
- Example: red:#ff0000, green:#008000, blue:#0000ff
- Make sure to add one space after each comma before writing the next color.
- The color name must exactly match the product variant name to ensure proper swatch display.
- This feature works only with static variant values. Dynamic color values selected via metafields are not supported.
How it works
The theme matches the variant option values (such as "Red", "Green", etc.) with the custom entries defined in this field. When a match is found, the corresponding hex color is used to display the swatch.
- The color name entered in this setting must match the product variant value.
- If a match is found, the defined hex color is shown as the swatch.
- If no match is found, the theme may fall back to default behavior or text labels.
Steps
- Open the Theme Customizer.
- Click Theme Settings.
- Select Custom color swatches.
- Enter your color values using the format colorname:#hexcode.
- Save the changes.