
Countdown timer
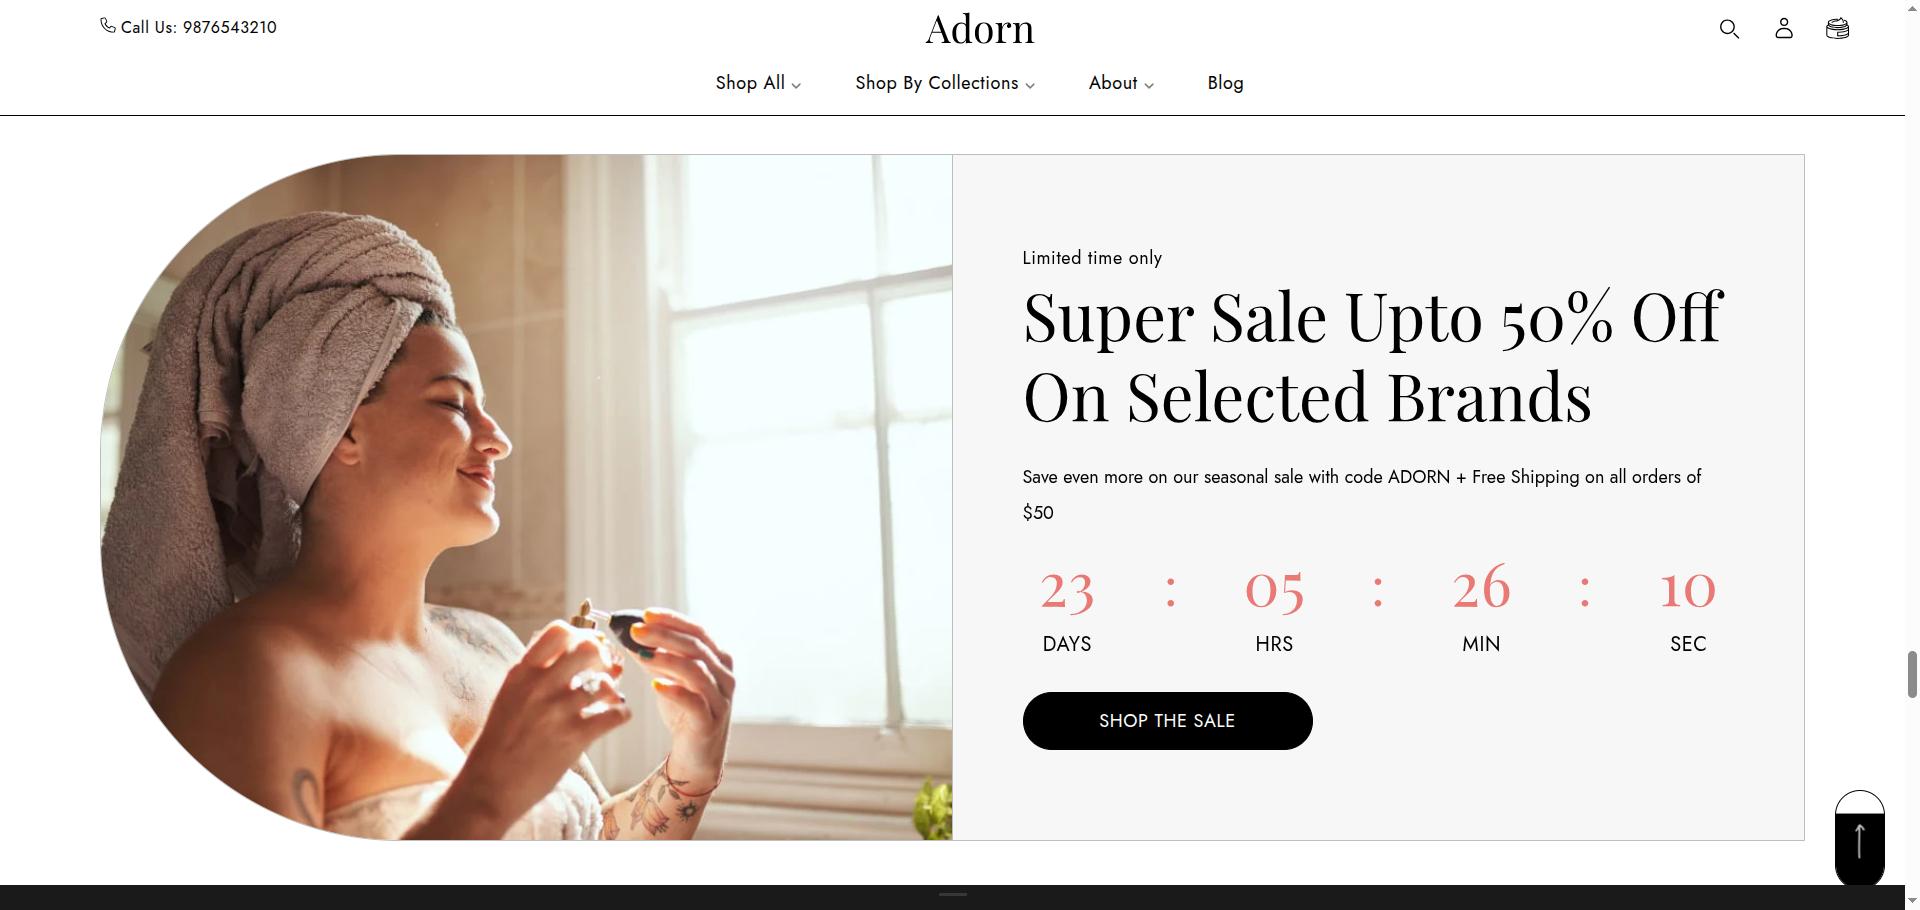
The Countdown Timer is a great feature that can highlight limited-time promotions or build anticipation for an upcoming sale or product launch.
Adding the Countdown timer section
- Open the Customizer and go to the page where you want to add the "Countdown" section.
- On the left-hand side, you'll find a list of available sections. Click the "Add section" button.
- From the available options, choose "Countdown"to add it to your page.
How to edit the Countdown Timer section
To configure the section background image and related settings in your Shopify theme, Adorn, follow these steps:
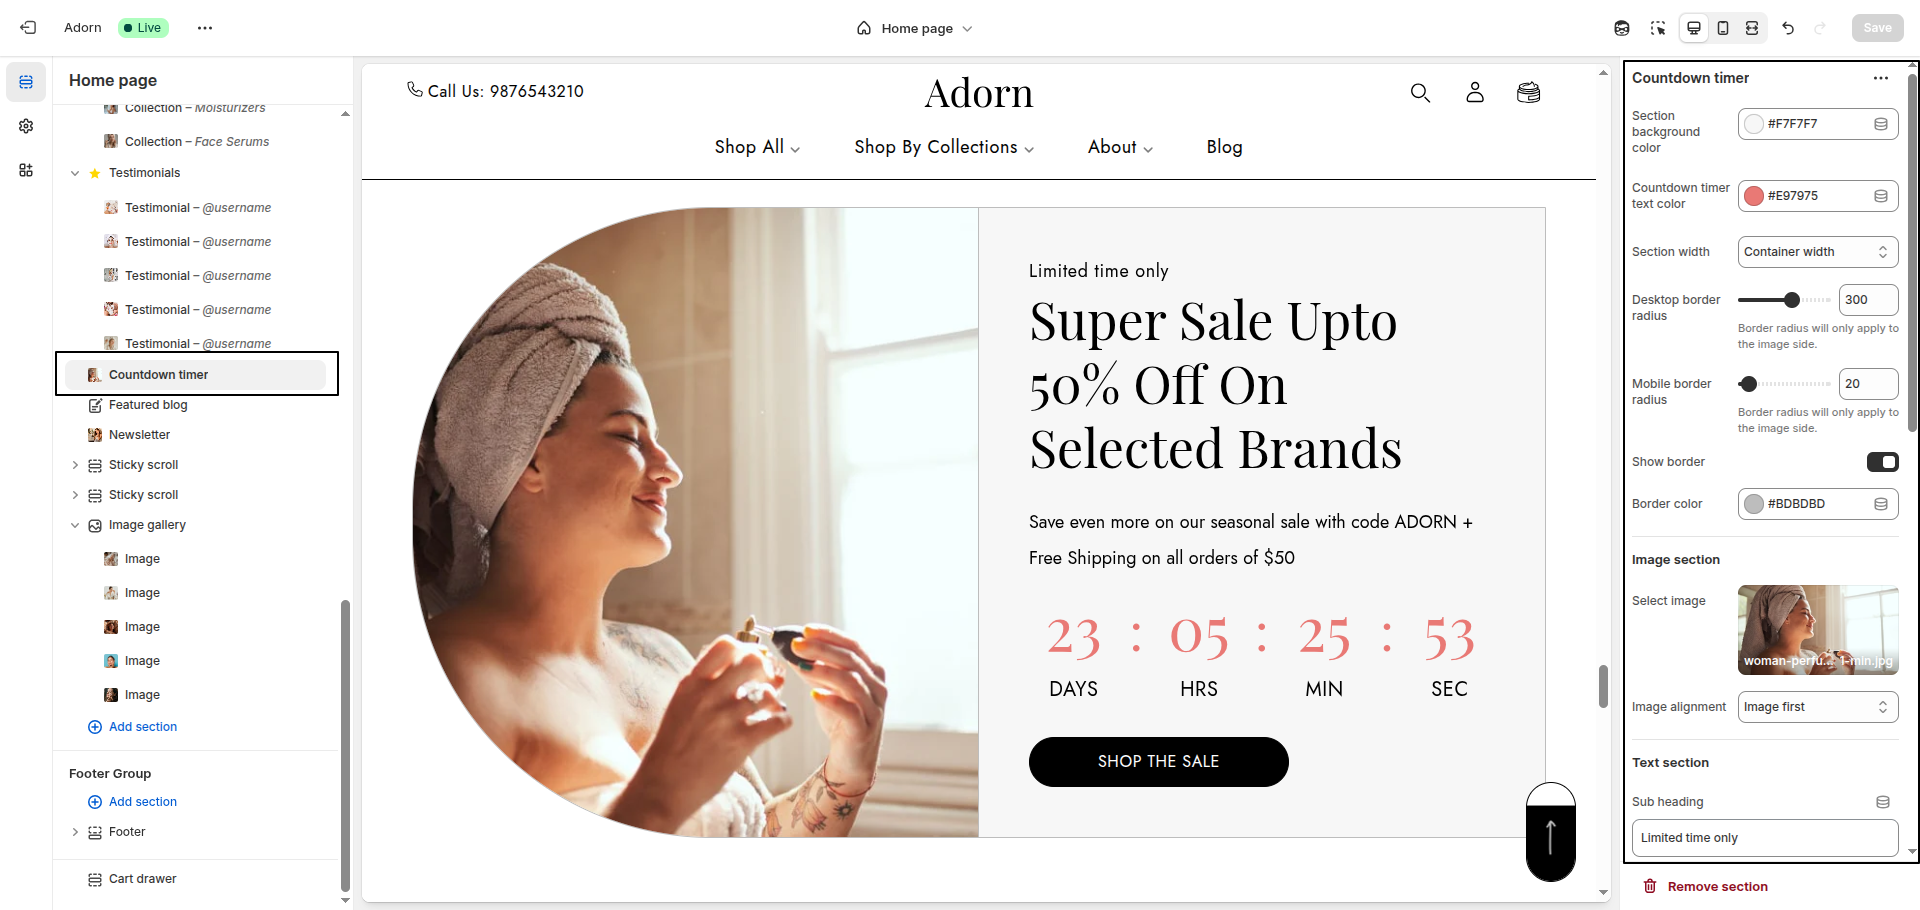
1. Countdown Timer Color Settings
- Section Background Color: Sets the background color of the entire section.
- Heading Color: Changes the color of the section heading text.
- Text Color: Controls the color of general text elements within the section.
- Button Background Color: Sets the background color of buttons.
- Button Text Color: Sets the text color inside buttons.
- Button Hover Background Color: Defines the background color of buttons when hovered.
- Button Hover Text Color: Defines the text color of buttons when hovered.
- Countdown Timer Text Color: Sets the color of the countdown timer text.
2. Set Section Width
- Full Width: Extends the slider across the entire screen.
- Container Width: Limits the slider within a fixed-width container.
3. Set Border Radius
- Desktop Border Radius: Specify the border radius for desktop displays.
- Mobile Border Radius: Specify the border radius for mobile displays.
4. Show Border
- Toggle Show Border to enable or disable borders around the section.
- Set the Border Color.
5. Image Section
- Click on "Upload images" to choose an image from your computer or select "Explore free images" to find a suitable image from Shopify’s library
- Image Alignment: Choose Image First or Image Second from the Image Alignment dropdown.
6. Text Section
- Text Block Background Image: To set a background image for the text block, click Upload images to add an image from your computer or choose Explore free images to use one from Shopify’s library. This background image enhances the visual appeal of the text area behind your content.
- Sub Heading: Enter a short introductory phrase.
- Heading: Include a bold and captivating headline.
- Text: Add a description or promotional message.
7. Set Countdown Date
- In the Countdown Date field, enter the end date: for data use YYYY-MM-DD format.
8. Configure Button
- In the Button Label field, enter the text you want for the button.
- In the Button Link field, paste the URL you want the button to redirect to or use the search feature to find the desired page.
FAQs
How does the countdown timer adjust for different time zones?
The countdown timer automatically follows the time zone set for your store, ensuring consistency across all customers viewing it.
How long does the 'End Text' message display?
The 'End Text' message will remain visible indefinitely until you update it with new date and time settings.
Why does my timer show 0:0:0:0?
This usually happens when the date or time format is entered incorrectly. Make sure:
- The date format is YYYY-MM-DD.
- The time format follows the 24-hour clock as HH:MM.
What happens when the timer ends?
The behavior of the timer depends on your settings:
- If you've added End Text, it will replace the timer.
- If you've enabled the Hide Timer option after expiry, only the section content (excluding the timer) will remain visible.
- If no action is taken, the timer will stay displayed as 0:0:0:0.