
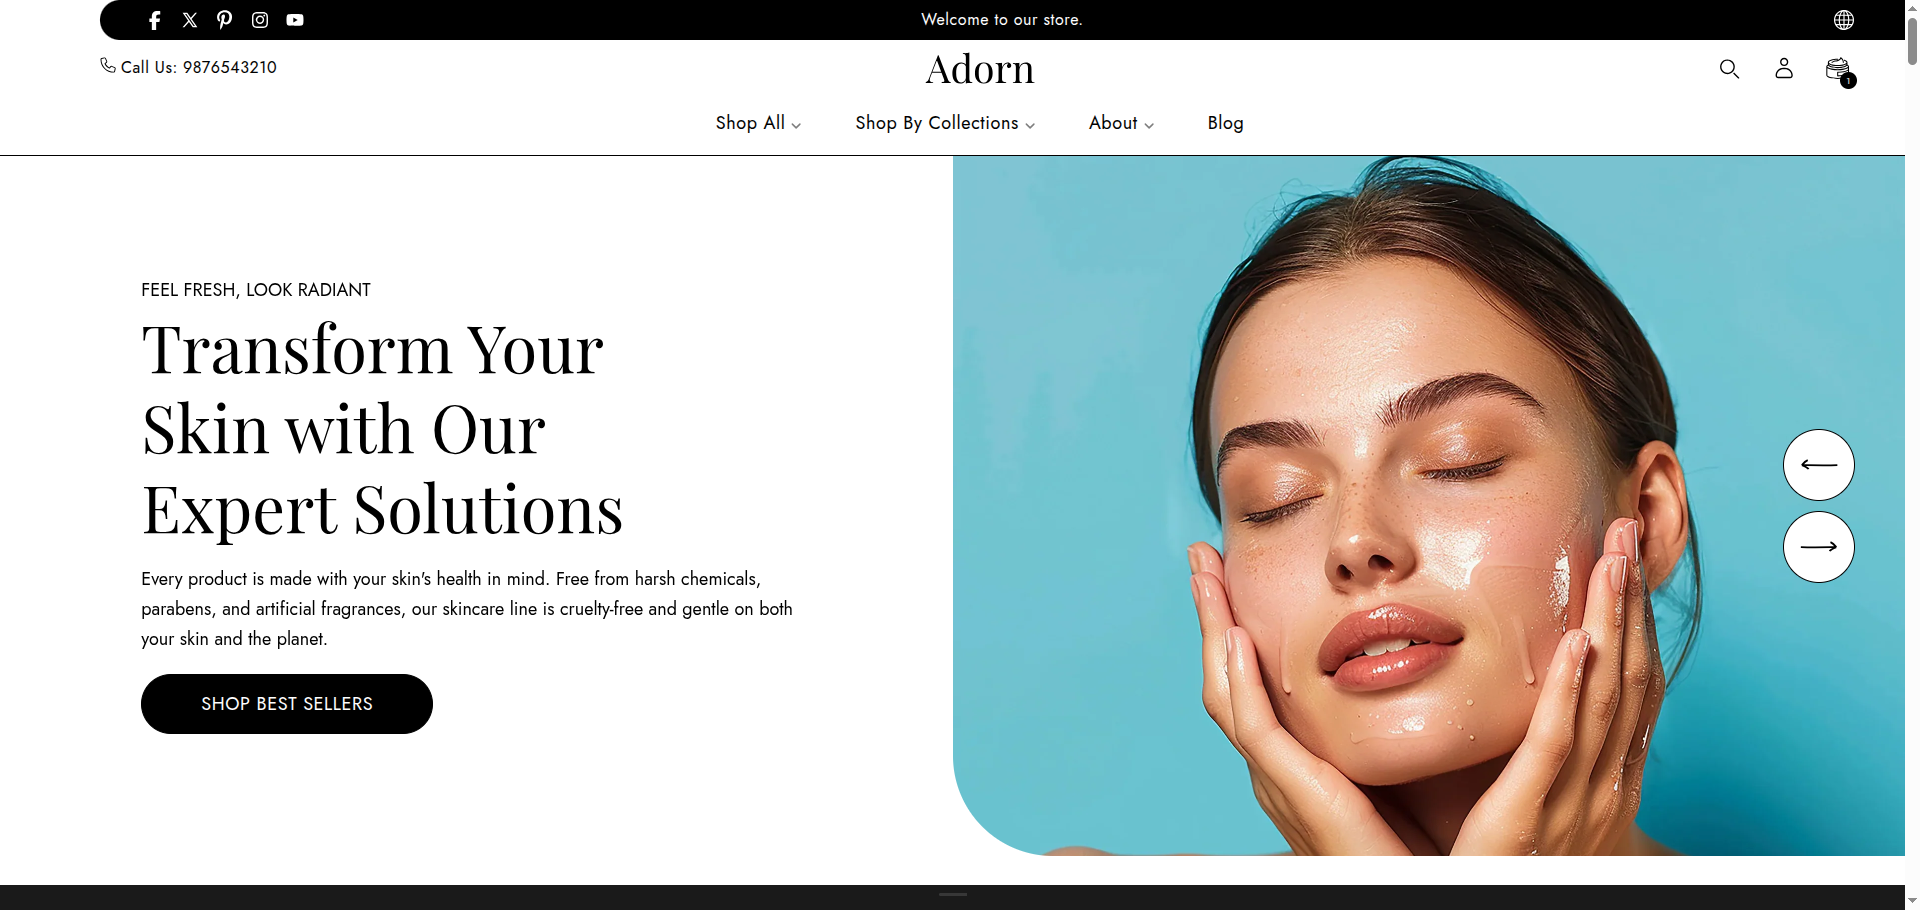
Hero Slider
The Hero Slider section in the Adorn theme is a versatile slideshow that allows you to showcase multiple images, headings, subheadings, and call-to-action buttons. It’s ideal for highlighting key content, such as featured collections, promotions, or announcements. Each slide can present a unique aspect of your store, incorporating elements like product images or promotional badges to enhance engagement. The Hero Slider helps you visually communicate your brand’s story and guide visitors through important areas of your website.
Adding the Hero Slider section
- Open the Customizer and go to the page where you want to add the Hero Slider section.
- On the left-hand side, you'll find a list of available sections. Click the "Add section" button.
- From the available options, choose "Hero Slider" to add it to your page.
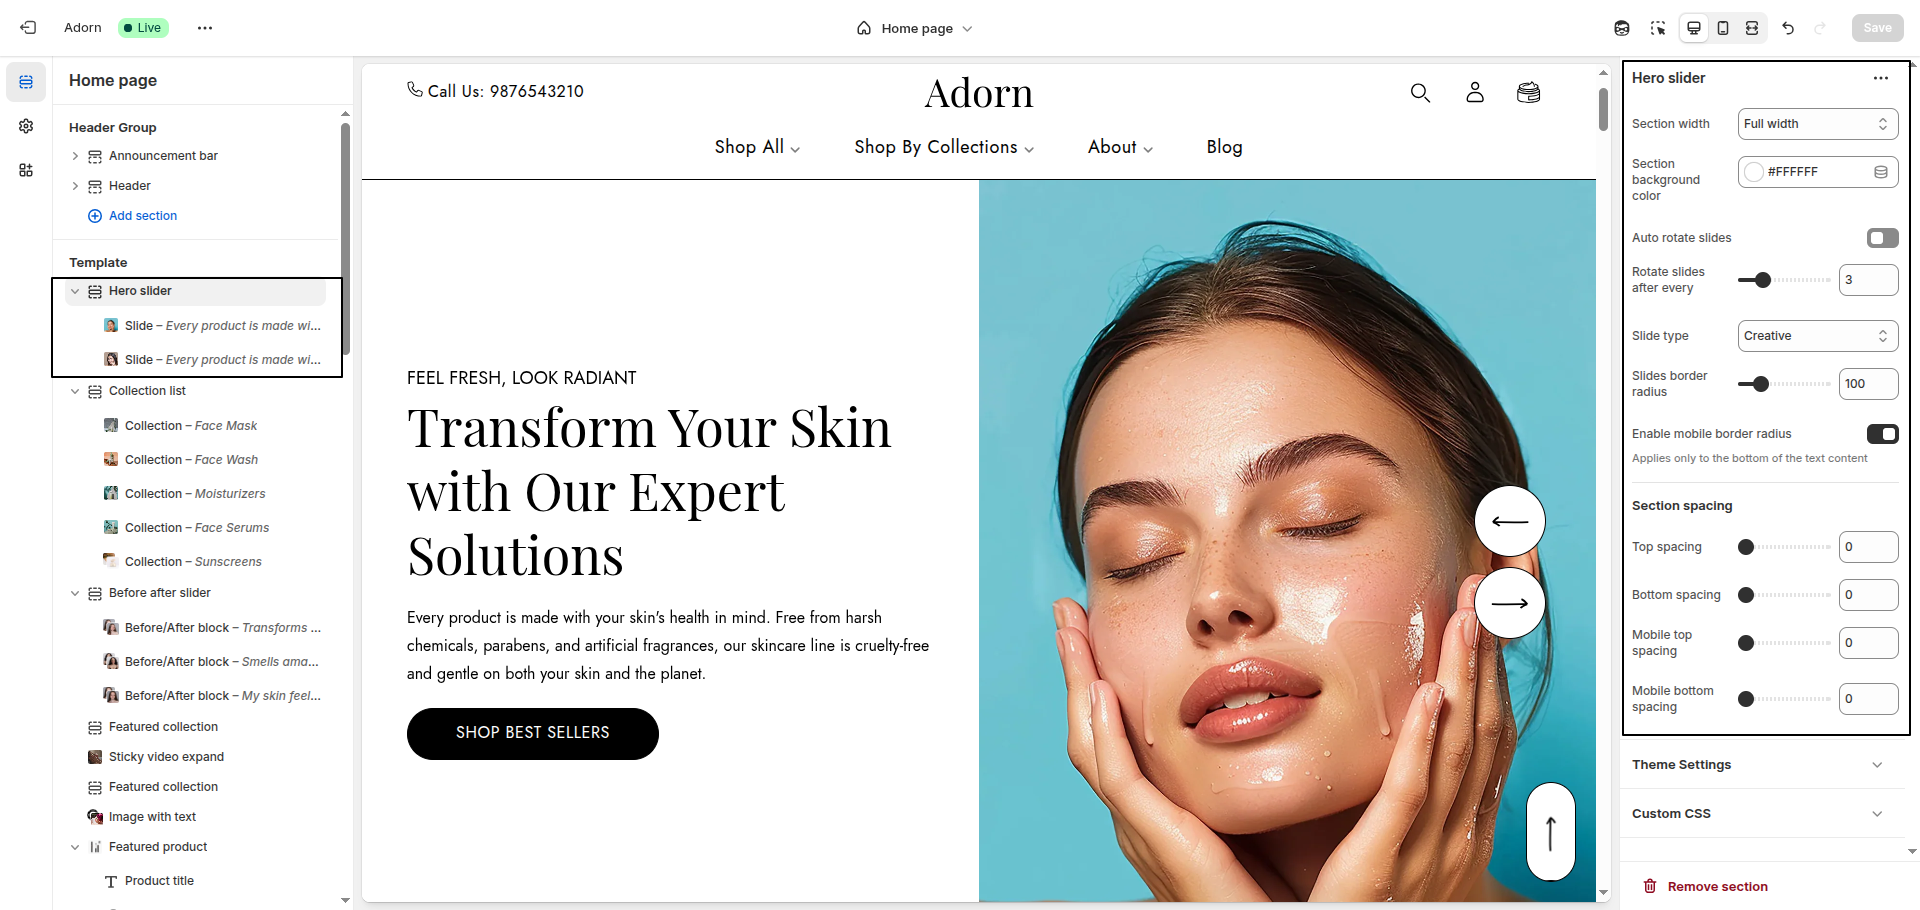
Steps to Configure the Hero Slider in Your Shopify Theme, Adorn
Here are the steps to configure the options mentioned for the Hero Slider section in your Adorn Shopify theme:
1. Section Background Configuration
- Background Color: Use this setting to define the base background color of the hero slider section.
- Set Background Image: Use the background image option to upload an image or choose one from free images.
This image will display only behind the text block in the slider, not the entire section.
2. Configure Slider Height
- Use the Slider Height setting to control how much vertical space the hero slider occupies on the screen.
- Available options:
- Half of the screen: Displays the slider at 50% of the screen height.
- One third of the screen: Displays the slider at approximately 33% of the screen height.
- Two third of the screen: Displays the slider at roughly 66% of the screen height.
- Full screen – adapt to first image height: Automatically adjusts the height based on the height of the first uploaded image. Ideal for image-driven layouts.
3. Configure Slider Behavior and Controls
- Auto Rotate Slides: Toggle this option to automatically cycle through slides.
- Rotate Slides After Every: Set the time interval (in seconds) between
each slide transition. Example:
3seconds. - Enable Arrows: Display navigation arrows to allow users to manually switch between slides.
- Enable Dots: Show dot indicators below the slider that reflect the number of slides and current position.
4. Slide Transition Type
Choose between two rotation types for your slides:
- Fade: Slides will transition with a fading effect.
- Creative: Slides will slide horizontally to the next one, creating a dynamic effect.
- Default: Slides will use the standard transition effect defined by the theme.
Set your preferred option based on the style you want for your Hero Slider.
5. Set Slides Border Radius
- Adjust the Slides Border Radius to round the corners of the slides.
Configure the Hero Slide Settings
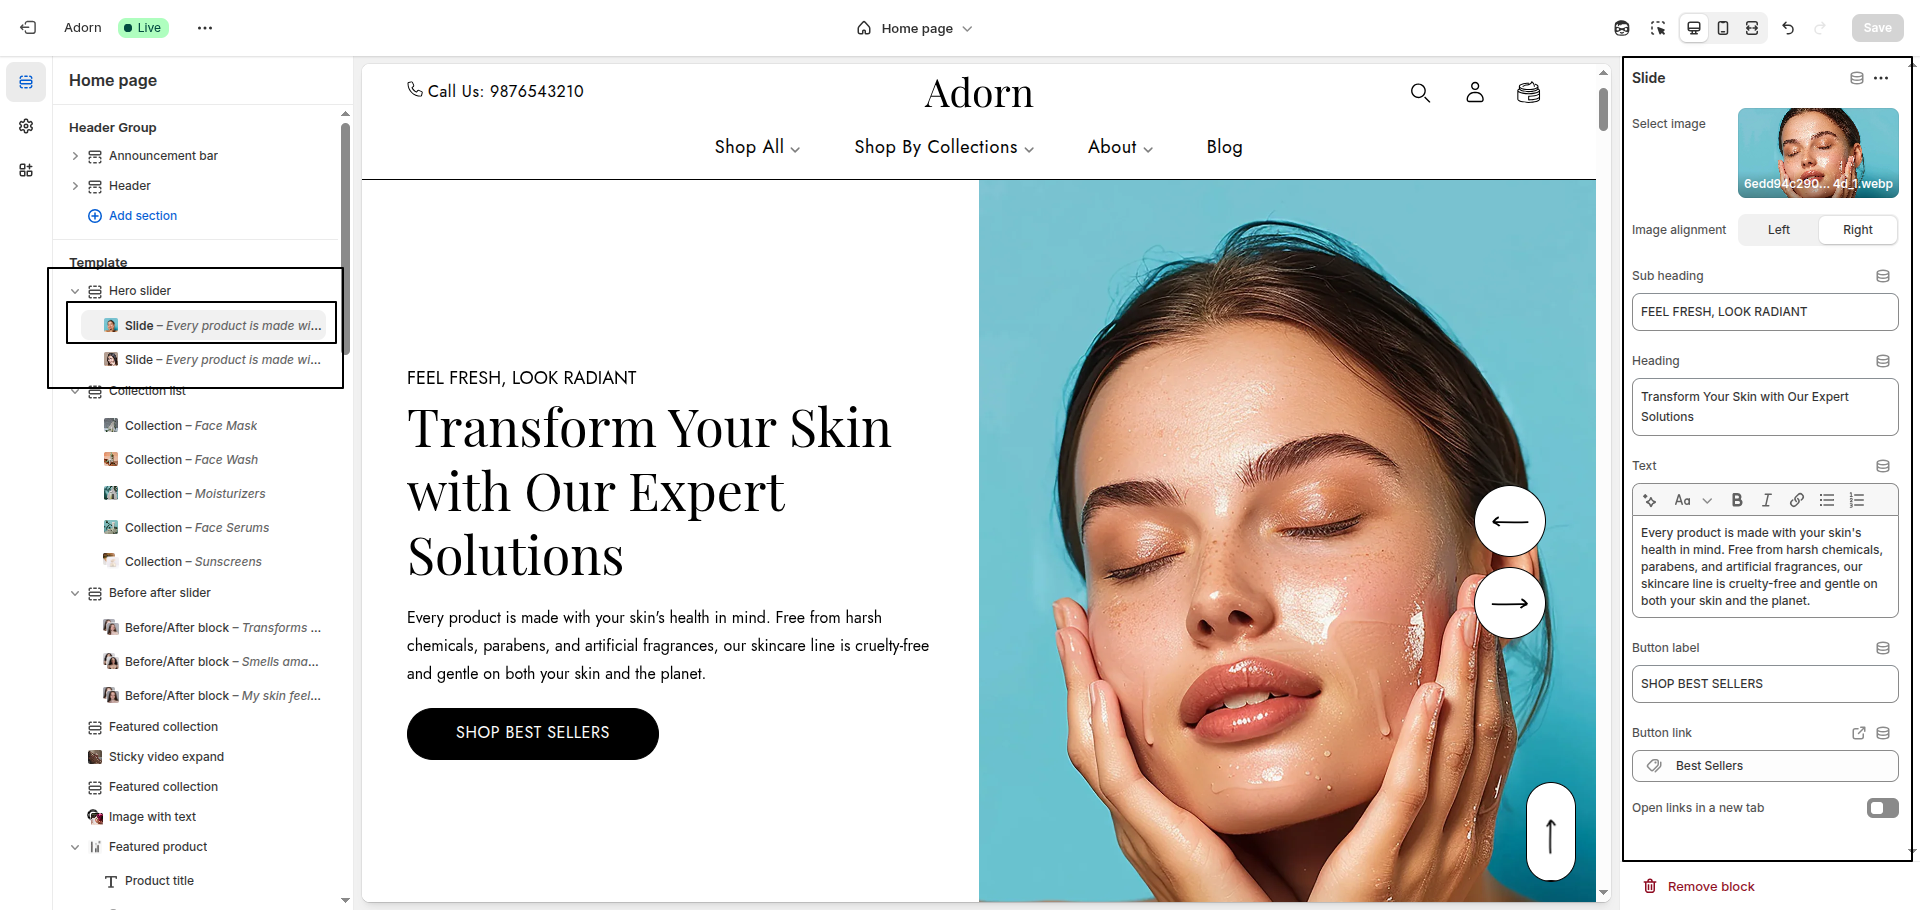
1. Upload an Image
- Select Image: Click "Upload images" to add your own image, or choose "Select image" or "Explore free images" to pick one from the library.
- Choose an image file that matches the recommended dimensions (1200x1200px) for optimal quality.
- Ensure no file issues appear during the upload process.
2. Set Image Alignment
Choose either Left or Right based on your design preference.
- Left: Aligns the image to the left side of the slide.
- Right: Aligns the image to the right side of the slide.
3. Set Image Fit
Choose between Cover or Contain to determine how the image fits within the slide.
- Cover: The image will cover the entire slide area, cropping parts if necessary to maintain aspect ratio.
- Contain: The image will scale to fit within the slide area without cropping, maintaining its original aspect ratio.
4. Configure Text Content
- Sub heading: Enter a short phrase.
- Heading : Enter a title for the slide.
- Text: Include descriptive text about the product or offer.
5. Add a Link and Button
- Configure the Button Label.
- Set the Link to direct users to a specific page.
6. Add and remove New slide
- Adding a New slide: To add a new slide, simply click on the Add slide button to add a new slide.
- Removing a slide: Select an existing slide and click the Remove Block button to delete it.
FAQs
Why is my image being cropped?
Hero Slider are designed to display multiple images within the same-sized space. If your images have varying dimensions, some parts may get cropped. For example, while your first image might fit perfectly, subsequent images with different sizes might not.
How to prevent cropping:
- Set the Image Height to Height of the first image in your slideshow settings.
- Ensure all slideshow images share the same dimensions for a seamless look.
Want to learn more about maintaining perfect image proportions? Check out Shopify’s guide on Understanding image aspect ratios.
Focal points and cropping:
Focal points let you highlight the most important part of your image, ensuring it stays in view regardless of screen size. However, this can result in other parts of the image being cropped to maintain focus on the focal point. For more details, explore Shopify’s Focal Points Guide.