
Before After Section
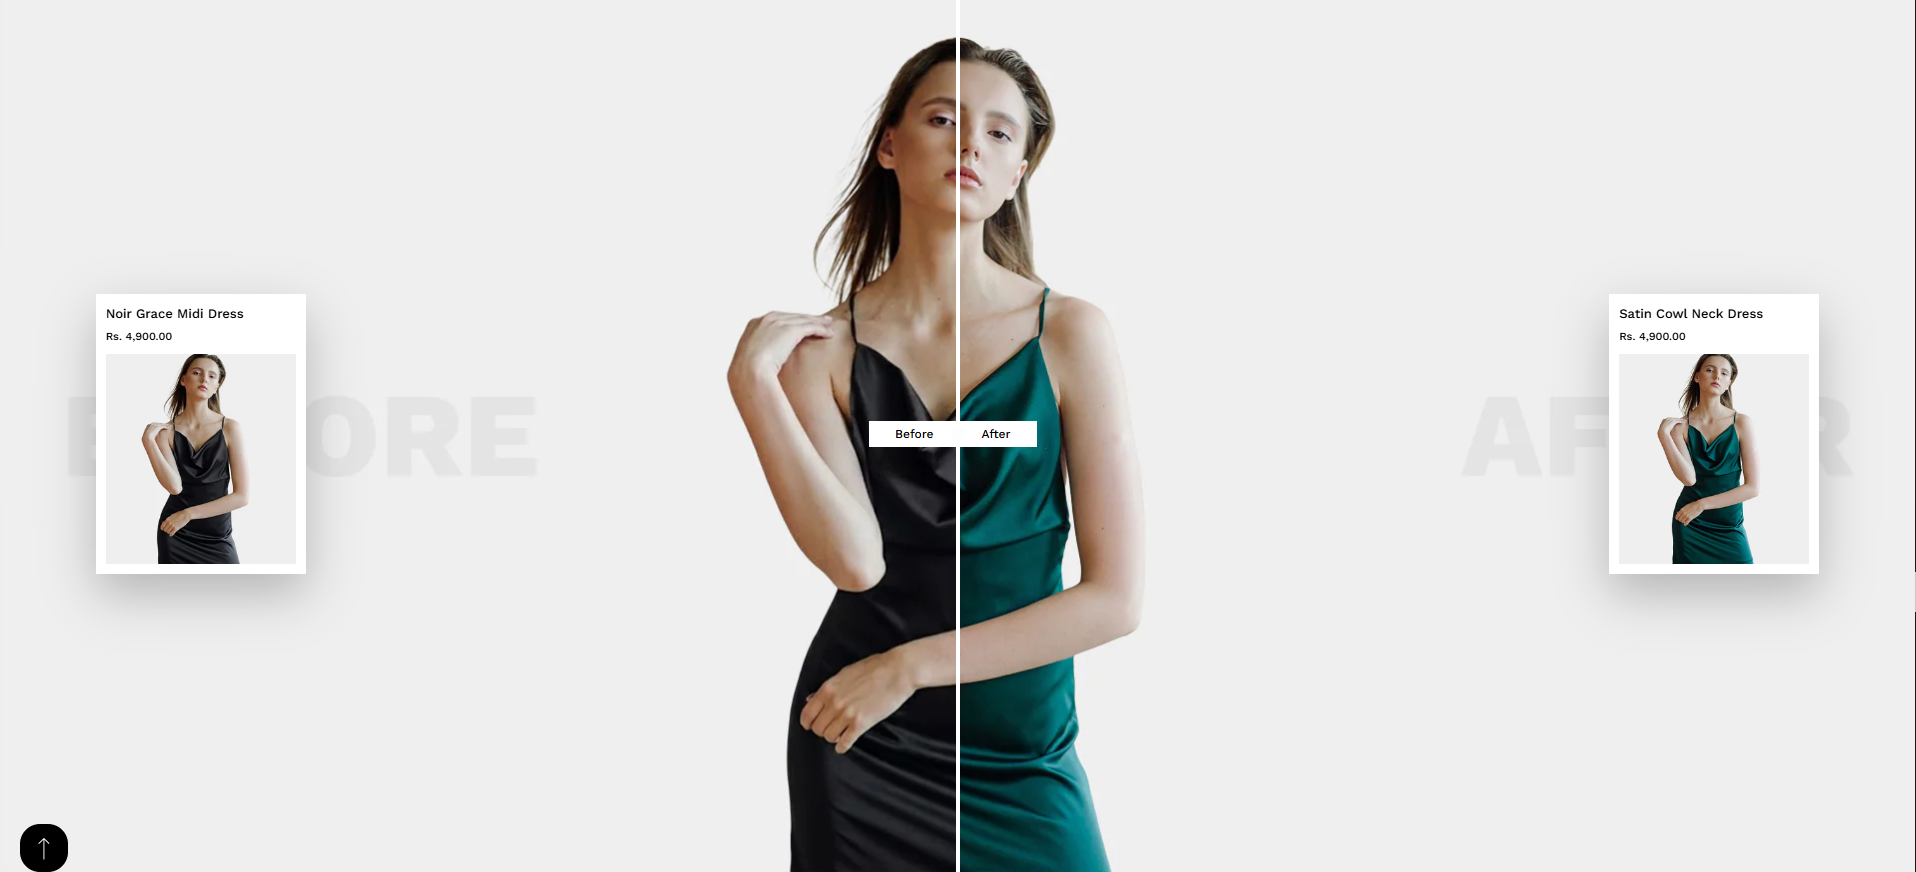
The Before After Section allows you to visually compare two images using an interactive slider. This section is useful for showcasing product transformations, style comparisons, or highlighting differences between two looks. Customers can drag the divider to reveal the before and after images, creating an engaging and interactive experience.
Adding the Before After Section
- From your Shopify admin, go to Online Store ? Themes.
- Click Customize on your active theme.
- In the Theme Editor, select the page where you want to add this section.
- Click Add Section and choose Before After Section.
- Click Save to apply the changes.
How to edit the Before After Section
Follow these steps to customize the before and after comparison section.
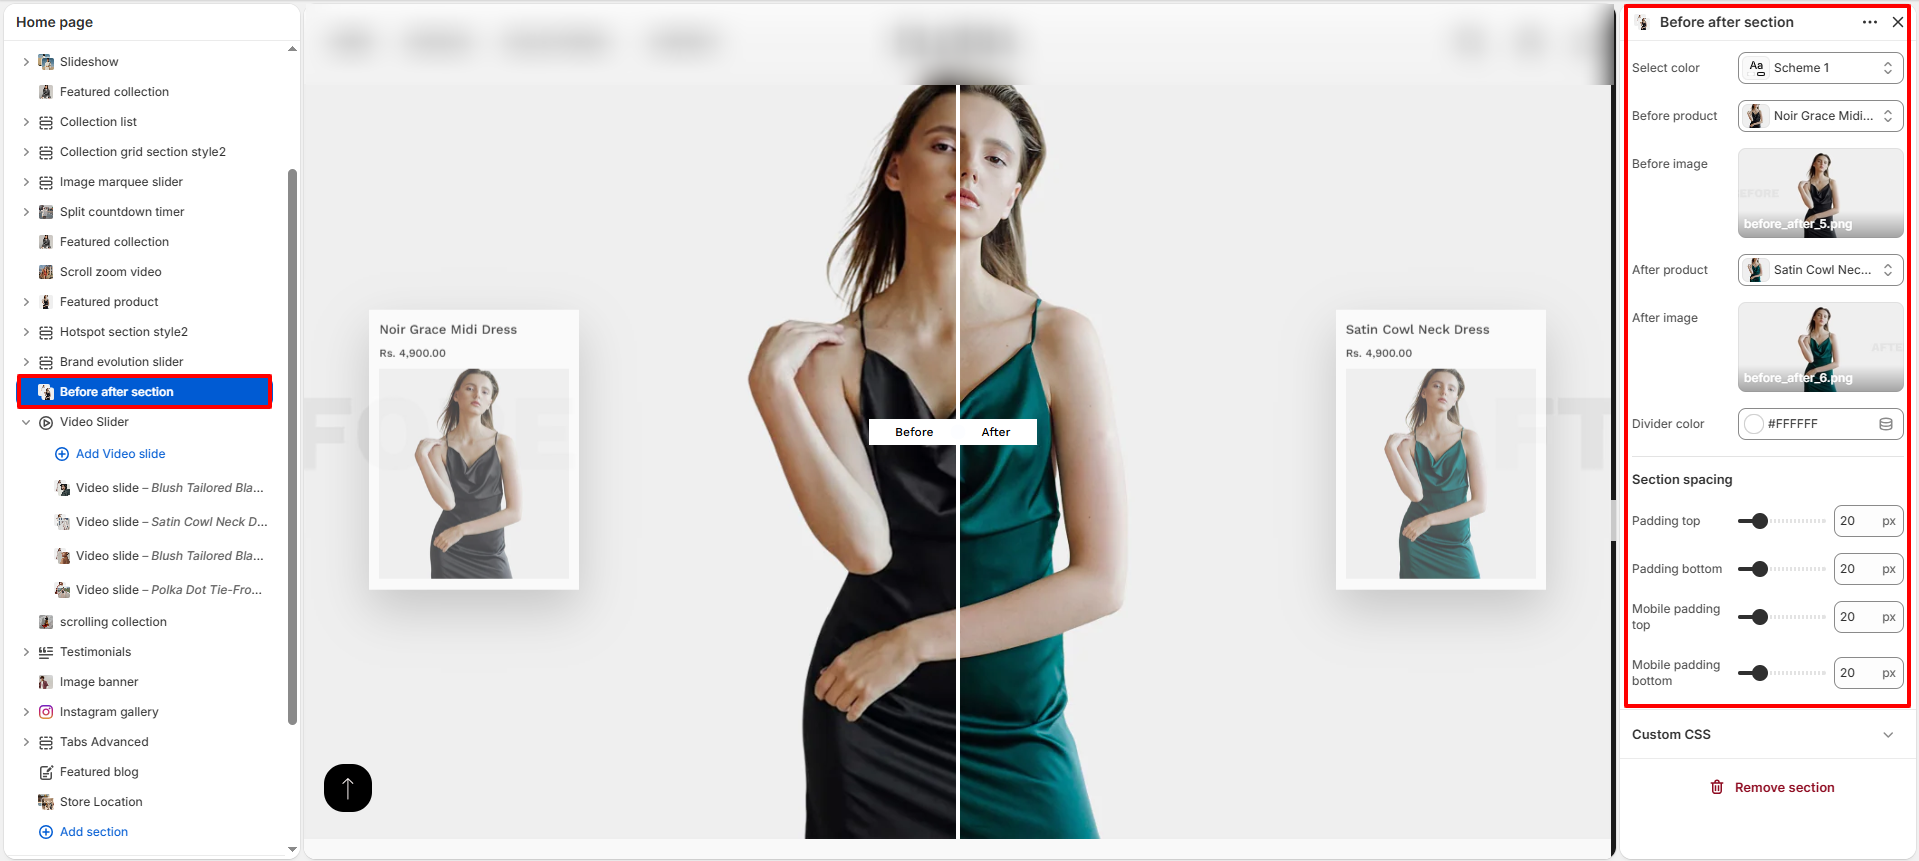
- Select Color Scheme: Choose the color scheme that controls the background and text style of the section.
- Before Product: Select the product that will appear on the Before side of the comparison.
- Before Image: Upload the image that represents the before state of the product or style.
- After Product: Select the product that will appear on the After side of the comparison.
- After Image: Upload the image that represents the after state of the product or style.
- Divider Color: Customize the color of the divider line that separates the before and after images.
- Padding Top: Adjust the spacing above the section.
- Padding Bottom: Adjust the spacing below the section.
- Mobile Padding Top: Control the top spacing of the section on mobile devices.
- Mobile Padding Bottom: Control the bottom spacing of the section on mobile devices.